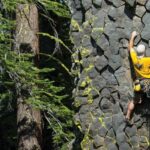
A custom-built wooden frame and plywood rock climbing wall at home may be as simple or as sophisticated as you wish. The steps for building any wall are essentially the same. Below is a general overview of where to begin and items to remember.
Learn the perfect rock climbing knots with Cruxcrush!
Step 1 Rock Climbing Wall At Home Plans
You must acquire the materials required to build your rock climbing wall at home. Along with the obvious carpenter’s equipment required for construction, you will need some specialized hardware for a simple plywood wall with a wooden frame. This list is far from exhaustive and will differ for every design.
- Carpentry tools such as a saw, screwdriver, hammer, drill with bits, and so on
- 1200 x 2400 x 17mm of structural plywood (minimum)
- Depending on the design, dimension timber such as 4×2 or 6×2 may be used.
- Metal screws and wood screws
- 3/8 “T-nuts with threads
- If you want to paint and/or texture your walls, you’ll need primer and paint.
- Textured paint or your concoction.
- 3/8″ bolts
- Holds for climbing.
- Some friends to help
- 1.5 “Stainless Steel Bolt $0.90
- 5/16 Ergo Wrench ” (large) $17.00
- 7/32 Ergo Wrench ” (small) $17.00
Step 2 Building The Wall: Making the Framework
Build the structure that will support the plywood. Please consult an engineer for framing requirements. This image depicts the framing of a very simple 2.4m 2.4m vertical climbing wall. In general, the stud spacing should be 60 cm (to the center of the stud).
The wall angle can be anything from vertical to steeper inclinations, such as 60 degrees beyond vertical and entirely horizontal. Steeper walls will need more support, which should be built specifically for the wall. For added safety, you may want to consult an engineer.
Plywood Preparation
If you plan on texturizing or painting your walls, you may start by painting every piece of plywood you estimate you’ll need. If you choose 17mm plywood, you may also paint the wall as the last stage. If you use a roller to paint the wall, you should be careful not to get paint on the t-nut threads. The t-nut is just 11mm deep, giving you a buffer of roughly 5–6mm from the plywood’s surface.
Paint the plywood with a white primer layer, followed by a coat of textured paint. Make your textured paint instead of paying for it. Simply mix some dry, fine beach sand with a latex paint of your choice. A decent ratio is to add 1-2 kg of sand for every 4L can of paint. Apply with a roller as usual.
For your wall, we propose a minimum thickness of 17 mm of plywood. The finest material is structural plywood, which comes in sheets of 2400 x 1200 mm. To save time measuring and cutting, design your wall using full-size sheets of plywood.
Drilling Plywood Holes For T-Nuts
Once the frame is complete, drill holes in the plywood and insert the t-nuts that will allow you to attach the grips to the wall. 4 pieces of plywood have been put together and hoisted off the floor with 4 x 2 according to the spacing of the framing for the wall they are going on in the photo below. Drilling four sheets at once saves time and allows you to drill more holes.
- To make hammering the t-nuts easier, use a drill bit that is near the diameter of the t-nuts but not precisely the same size. A better fit will assist in guaranteeing that the nuts go in straight. The optimal drill bit size for all of the t-nuts we sell is 12 mm or 7/16.”
- If your wall has uniform framing, mark the studs on one sheet of plywood, then set this sheet on top of your other sheets of plywood and drill as many sheets as your drill bit will allow at once to save time.
- When drilling the t-nut holes through many sheets of plywood, it is critical to maintain the drill bit perpendicular to the plywood.
- The t-nut holes can be placed at random or in a grid (but not where your studs will be), and a suitable ratio is 70-100 nuts per complete sheet of plywood.
Putting T-Nuts On The Plywood
- Now that the holes have been bored, it is time to hammer in the t-nuts.
- If possible, lay the plywood flat on the floor, preferably concrete, put on some ear plugs, and hammer away.
- Hammer the t-nuts in straight to avoid cross-threading when attaching grips later.
- This is a team effort!
- The T-nuts should be hammered in until they are flush with the plywood.
- Make sure the t-nuts are level with the plywood.
- Yes, adding and tightening a hold will draw the t-nut flat to the plywood, but it puts a lot of force on the t-nut where the threaded sleeve joins the base and weakens it enough to fail, especially zinc-plated t-nuts.
- Tightening the t-nut threaded sleeve too much weakens it where it links to the base of the t-nut.
Plywood Attachment To The Frame
Attach your plywood to your frame from the bottom up with at least 10 gauge wood screws that are twice the thickness of your plywood or more. Screws should be spaced every 20 cm or so around the outer border of the plywood and any internal studs.
Climbing Holds May Be Added To Your Wall
The next and last step is to secure your climbing grips to the wall. The bulk of climbing holds will be secured to your wall with 3/8″ bolts “threads that are available in a range of lengths and metals. To tighten the grips, you’ll need an Allen key or a special tool specialized for the job.
Some grips are fastened merely with screws and are known as “screw-on holds.” All you need are some screws and the necessary tool. Various orientations will make most holds either more positive and easier to hold onto, or more negative and difficult to hold onto. Thus, altering the direction of the grip is all it takes to transform a wall.
Because you went through the bother of hammering in around 80 t-nuts into each sheet of plywood, you may also modify the look of your wall by rearranging the holds. Avoid overtightening grips. It will weaken the t-nut and may cause it to fail.
Step 3 Padding
You’ll need a soft landing area now that you’ve built a climbing wall. Arrange with a local upholsterer to accept all of their offcuts for a couple of months. As they have to pay the local landfill to dispose of them.
When you have an abundance of offcuts, cover the entire area in a low pile or thin industrial carpet that you can simply recover from the tip for close to nothing. Screw the carpet to the very bottom of the wall to keep it from sliding about. Within 30-40 cm of the base of your wall, no padding is necessary.
Old mattresses are ideal for heavier cushioning. After you’ve built a couple of layers of mattresses offset like bricks, add some foam offcuts on top, then the carpet, and you’re ready to go. If your wall is not too large, a bouldering pad can be used to soften landings.
Conclusion
You’ve completed the task! You are now ready to climb. Some extras to consider are chalk and a chalk bag to keep your hands dry, and route/problem marking tape to build boulder problems.


