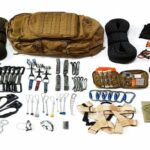
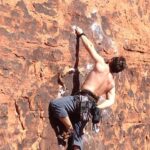
In the last 30 years, climbing gyms have come a long way. There are already six cutting-edge facilities in Seattle, more than ten in the Denver metropolitan region, and most towns throughout the country are following suit. Even in regions like Florida and Kansas, where there is no outdoor rock climbing for miles, there are several gyms where you need to use indoor rock climbing gear.
Read out a guide for indoor rock climbing beginners.
Why is it so popular? Simply put, indoor climbing is cool, sociable, a fantastic workout, and a lot of fun. If you’ve never been to a climbing gym before, you’re likely to have a lot of questions. We’ve broken down everything you need to know before your first gym session, including what indoor rock climbing gear to buy.
1. Rope
Connecting the dots You’ll need to master the Figure-8 Follow-Through Knot (which is occasionally followed by a wholly superfluous, but visually appealing, Double Fishermen’s backup knot). Simply remember to tie a Figure 8 (with an arm’s length or more of rope out), then run the end of the rope through the tie-in points of your harness (not the belay loop, but the points connected by the belay loop), and then retrace the 8 before adding an optional backup knot.
Equipment inspections Check that the knot is properly knotted and passes through the relevant tie-in locations. The belay device and carabiner are next: Verify that the carabiner is latched and that the belay device is correctly loaded. Check that the harnesses of both the climber and the belayer are correctly fastened and that the buckles (if required) are doubled back.
Most contemporary harnesses on the market are already properly configured. But it’s always a good idea to double-check that the webbing is securely fastened at the waist and leg loops.
2. Climbing Shoes For Indoors
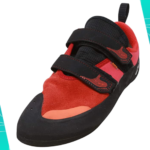
If you’re just starting, your shoes should be tight but comfortable, with a reasonably flat sole. It’s easy to spend $200 on a pair of shoes these days, but if you’re just starting, we don’t encourage it. Entry-level models like the Evolv Defy (and Elektra for women) and Butora Endeavor are excellent all-around choices. If you learn quickly, choose a more advanced shoe with a mild downturn (banana shape) and a rather snug fit.
3. Climbing Harnesses For Indoor Use
If you’re looking for a gym harness, you should opt for something comfy and long-lasting. Many high-end harnesses are designed for trad, alpine, or sport climbing and are particularly designed for outdoor climbing. That means they’re incredibly light (since you’ll be carrying them for long distances) and stylish (since you will likely keep them on all day and sometimes hike a good bit wearing them). However, none of these issues is a serious worry with an indoor climbing harness.
Instead, expect to spend a lot of time dangling and falling, which necessitates the purchase of a comfortable and long-lasting harness. And if you’re new to the sport and aren’t sure what you think of it, don’t spend $150 on a harness. A perfectly decent model is available for $50. If you get addicted, later on, you may spend a lot of money on a premium harness.
Consider the Black Diamond Momentum or Edelrid Jay (or women’s Jayne) for indoor climbing. Both are $60 and have all the bells and whistles you’ll need on indoor walls. Check out the amply padded Metolius Safe Tech Deluxe and Misty Mountain Cadillac if you’re seeking a harness that prioritizes comfort, but both are about twice the price of the aforementioned models and overkill for younger gym climbers.
4. Belay Mechanisms
There are several sorts of belays, including antiquated “8-style” systems, contemporary tube-style devices, assisted-braking devices, and simply attaching a Munter hitch to a locking carabiner. Tube-style devices (usually known as ATCs, independent of a brand) and Grigris are the two most frequent types you observe and the ones needed by most gyms.
There has been a lot of dispute over the years regarding which type of belaying equipment is superior, and the majority of it stems from inappropriate device use. Whether you have an ATC or a Grigri, it doesn’t matter if you belay using the right PBUS approach.
Whatever gadget you select, keep in mind that various gyms have their preferences. Before you buy, be sure the gym where you’ll be climbing allows you to use that equipment. Don’t make any assumptions because it might go either way. Ask first, then purchase. Check out our post on the best belay devices for climbing for more information on belay devices.
5. Chalk
In Elb Sandstein, a tiny mountain hamlet on the border between Germany and the Czech Republic, local climbers have chosen not to use chalk for hands to preserve the natural aspect of the stone. Chalk is used everywhere else, including the gym. Chalk dries off your sweaty palms while climbing, letting you retain greater friction on slick holds. That being said, it’s useful to know a few things regarding chalk and chalk bags. Consider the following considerations:
Chalk Buckets VS Chalk Sacks
Most rope climbers carry a tiny bit of chalk on their harnesses to dry their hands frequently while they scale the wall. You will need a chalk bag for this. Boulderers, on the other hand, rarely bring chalk with them because they are only on the wall for 10 to 15 feet.
Instead of chalk bags, they prefer chalk buckets, which are bigger pods or sacks with enormous broad apertures and slots or pockets for carrying brushes, munchies, and so on. Lunch Bag for Organic Climbing The most common is the chalk bucket, and it’s a terrific one. If you need a chalk bag, the Metolius Competition bag is inexpensive and spacious, and Black Diamond’s Gym Chalk Bag has a refillable chalk ball and a place for your belay tag.
Loose Chalk VS Chalk Balls
This is something you should inquire about at your local gym. They may have a preference (for example, many gyms dislike loose chalk since it is untidy). I prefer loose chalk. You can just dip your hand in and it dries instantaneously, but a chalk ball requires you to press to obtain the chalk. Who wants to squeeze when their forearms are already pumped? However, chalk balls are neat, tidy, and frequently refillable. Take a look at the Metolius Super Chalk Sock.
Climbing Chalk For Indoors
Chalk In Liquid Form
This is a newfangled invention, but it’s rather cool. Shake powdered chalk and rubbing alcohol together in a squeeze tube. When you apply it to your hands, the rubbing alcohol evaporates, leaving an even and clean layer of chalk on them. This thing is a little more expensive than conventional chalk, but it’s far less messy. Petzl creates an excellent combination.
Drying agents should be avoided. While we don’t know the molecular formula for these drying chemicals, we do know that they leave our hands chapped and cracked. We recommend avoiding drying chemicals at first and only using them when necessary.
Friction Labs
This might be the world’s first chalk-specific climbing firm. Friction Labs chalk is somewhat pricey, but it is said to work wonders for making your hands sticky (and we know many climbers who swear by the stuff). We’ve used it sporadically, and it works reasonably well. However, plain old-fashioned (and far cheaper) chalk does as well. We’ll let you determine whether the high price is justified.
6. Helmet
We’ve never seen somebody wearing a helmet while climbing inside in our ten and a half years of climbing. Having said that, you can knock your head in a climbing gym, especially while lead climbing. If you take a lead fall with your leg behind the rope, the rope has the potential to turn you upside down, causing your head to collide with the wall.
If you’re not wearing a helmet (which you aren’t), pay special attention to your footwork. At the summit of bouldering walls, keep an eye out for heel hooks or other sideways body positions, especially if massive holds are sticking out underneath you. If you’d rather be safe, we’ve compiled a complete list of our finest climbing helmets here.
Summary
Indoor climbing is enjoyable and social. Climbing requires the Figure-8 Follow-Through Knot. Start with snug, comfy shoes with a flat sole. Also check the belay device, carabiner, and harnesses.
Simply tie a Figure 8 (with an arm’s length of rope out), pass the end of the rope through your harness’s tie-in points (not the belay loop), then retrace figure 8 before adding an optional backup knot. Beginners shouldn’t spend $150 on a harness. If you become hooked, you may buy an expensive harness.
Different gyms have preferences for different gadgets. Chalk Boulderers like chalk buckets, which have large openings and slots or pockets for brushes, snacks, etc. Most chalk bags contain a belay tag and a refillable chalk ball. Metolius’ Super Chalk Sock is more costly but less dirty.
Most rope climbers carry chalk on their harnesses to dry their hands. If you take a lead fall with your leg behind the rope, you might flip. Unless you’re wearing a helmet, watch your footwork.


