Pull-ups the DIY manual: One of the most commonly asked questions by those who have just gotten into climbing and want to improve is, “How do I work up to doing a pull-up?” Today on Crux Crush, Galina Parfenov, professional climber and climbing trainer shares her step-by-step manual for working up to doing a pull-up.
This is probably the number one question I get asked by clients, YouTubers, climbing, and fitness fanatics alike. Actually, it’s a question I never considered until recently. I started gymnastics when I was about eight, and prior to that, I had spent a majority of my life hanging from and doing pull-ups on a contraption called a Sports Complex. In other words, pull-ups had always been a part of the repertoire, hence I never had to go through the process of learning to do one as an adult.
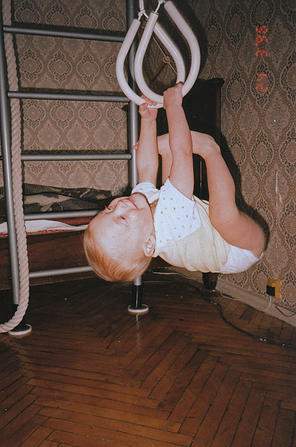
At 18 months, working on my pull-up strength.
That being said, building up to a pull-up is easy. Pull-ups are simply a matter of linear progression, which means you increase the difficulty of the exercise each workout at a constant rate (say, adding 10 lbs to 5×5 deadlifts each week). Everything else stays constant. In this post I will give the novice-intermediate climber a handful of exercises for working up to doing at least one pull-up. Choose ONE and stick with it until you can do one pull-up. The worst thing you can do is jump between programs and exercises.
Pull-up Technique
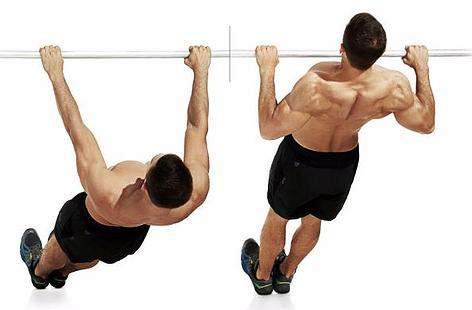
But before we dive deeper into the exercises, let’s go over the proper pull-up form. The primary variable in form is grip width and whether your hands are pronated (palms facing away), supinated (palms facing in), or neutral (palms facing the thighs). The pull-up grip should be slightly wider than shoulder-width, with the hands pronated. This grip has been shown in multiple studies to engage the latissimus dorsi or lats (largest muscle of the back) more so than a neutral or supinated grip.
Check out another exciting article here!
Likewise, positioning your hands too wide outside the shoulders doesn’t allow you to hit the strongest 90-degree angle at the elbows. For each pull-up get your chin over the bar by pulling up all the way and not straining your neck, then lower slowly until your elbows lock (the primary concern is hitting a full range of motion (ROM); anything short of full extension is classified as a half or quarter pull-up). Focus on squeezing your shoulder blades together as you move up and keeping your chest up the entire time.
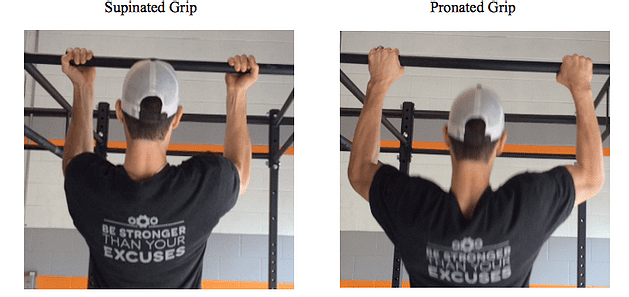
Supinated and pronated grips (Photo: CrossFit 1080)
Exercise List
Here, from best to worst (but all perfectly acceptable) are the best pull-up progression exercises:
#1: Pulley System
I have chosen the pulley over the assisted pull-up machine as the #1 exercise because 1) Pulleys more closely simulate the movement patterns of a free body pull-up, and 2) More people have access to a pulley than to an assisted pull-up machine. Actually, with a trip to Home Depot, the entire pulley system can be yours for under $20.
Check out a basic pulley setup in my Advanced Training for Climbing video. Make sure the pulley is far enough from the bar or hang board where the weight on the other end does not get in the climber’s way. The same concept can also be accomplished with a two-pulley system, as outlined in this article. Since we don’t want grip strength to be the limiting factor, I would recommend setting the pulley up with a pull-up bar rather than a hang board.
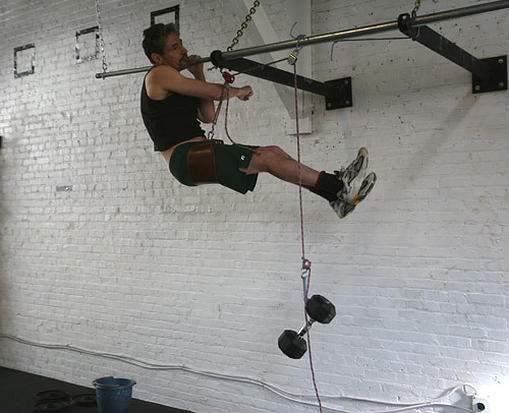
The two-pulley system allows the weight to be positioned away from the climber, without generating excess lateral force (Photo: Extra Strong)
Workout Structure
Each workout is structured as follows:
-4-6 minute cardio warm-up (treadmill, jumping jacks, rowing machine, jumping rope…anything goes, as long as it’s not taxing on the lats and biceps!)
-5 sets of 5 pull-ups with 5-minute rest in between sets (note, however, that the resting period is a guideline; since we are concerned with strength rather than hypertrophy, you can and should rest longer if you don’t feel recovered after 5 minutes)
-One to two workouts per week, with 2-4 days between workouts (do one workout per week if you feel you are not recovering enough to drive progress)
Sample Progression
Each workout, you decrease the weight on the pulley by 2.5-10 lbs (keep in mind that the higher the weight on the pulley, the easier the exercise). Intermediate-advanced climbers: use the same method to drive progress on weighted pull-ups (except that you increase the weight attached to your harness by 5-10 lbs each workout), as well as assisted one-arm pull-ups. Here is a sample progression:
- Monday, Week 1: 30x5x5 (lbs x reps x sets)
- Thursday, Week 1: 25x5x5
- Monday, Week 2: 20x5x5
- Thursday, Week 2: 15x5x5
- Monday, Week 3: 10x5x5
- Thursday, Week 3: 5x5x5
- Monday, Week 4: 0x5x5
In less than a month, our theoretical climber is able to do not one, but five sets of five pull-ups, unassisted. Linear progression prevails once again!
But what happens when progress stalls and our climber cannot complete all five sets at the given weight and rep range? For instance:
- Monday, Week 1: 30x5x5 (lbs x reps x sets)
- Thursday, Week 1: 25x5x5
- Monday, Week 2: 20x5x5
- Thursday, Week 2: 15x5x5
- Monday, Week 3: 10x5x2, 10x4x1, 15x5x2
On Monday of Week 3, the climber was only able to complete two sets of five with 10 lbs and had to go back up to 15 lbs for the last two sets. This is what one would call a plateau. Fortunately, we have a couple of tricks up our sleeves for cases like this.

The majestic plateau. Also one of the most frustrating experiences as an athlete. (Photo: Britannica)
1) Reset
For the next workout, increase the weight on the pulley significantly (+25-50%) and immediately resume the linear progression of 5 lbs per week:
- Monday, Week 1: 30x5x5 (lbs x reps x sets)
- Thursday, Week 1: 25x5x5
- Monday, Week 2: 20x5x5
- Thursday, Week 2: 15x5x5
- Monday, Week 3: 10x5x2, 10x4x1, 15x5x2
- Thursday, Week 3: 20x5x5
- Monday, Week 4: 15x5x5
- Thursday, Week 4: 10x5x5
- Monday, Week 5: 5x5x5
- Thursday, Week 5: 0x5x5
It will take a bit longer, but the end result is the same, and our climber is able to do five pull-ups completely unassisted. We can even take it a step further, and decrease the total number of seats, in addition to decreasing weight:
- Monday, Week 1: 30x5x5 (lbs x reps x sets)
- Thursday, Week 1: 25x5x5
- Monday, Week 2: 20x5x5
- Thursday, Week 2: 15x5x5
- Monday, Week 3: 10x5x2, 10x4x1, 15x5x2
- Thursday, Week 3: 20x5x1
- Monday, Week 4: 15x5x1
- Thursday, Week 4: 10x5x3
- Monday, Week 5: 5x5x3
- Thursday, Week 5: 0x5x5
This second reset technique allows the climber has a longer recovery period.
2) Taper
For a taper, our climber will keep the rep range (5 pull-ups) and change in weight (5 lbs per week) constant, but drop the number of sets week to week, until he cannot decrease the weight anymore under these conditions.
- Monday, Week 1: 30x5x5 (lbs x reps x sets)
- Thursday, Week 1: 25x5x5
- Monday, Week 2: 20x5x5
- Thursday, Week 2: 15x5x5
- Monday, Week 3: 10x5x2, 10x4x1, 15x5x2
- Thursday, Week 3: 5x5x2
- Monday, Week 4: 0x5x1
Even though the climber cannot yet do five sets of five pull-ups, he can do one set of five pull-ups, which is four more reps than he initially set out to do (-:
The above techniques (reset and taper) and workout format (5×5 with 5 min rest) can and should be applied to all of the pull-up progression exercises described below. Again, keep in mind that resets and tapers should ONLY be used if you are unable to complete 5×5 at the programmed weight. Otherwise, stick to linear progression.
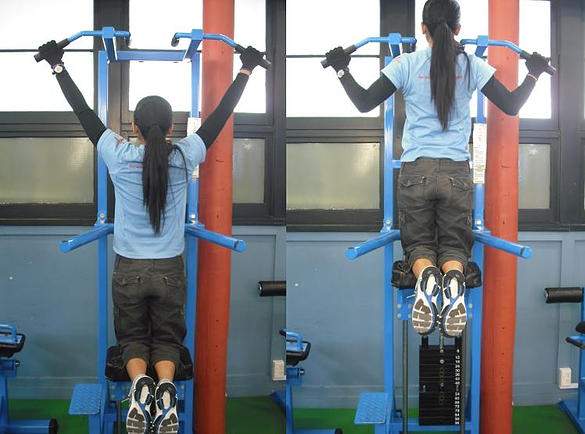
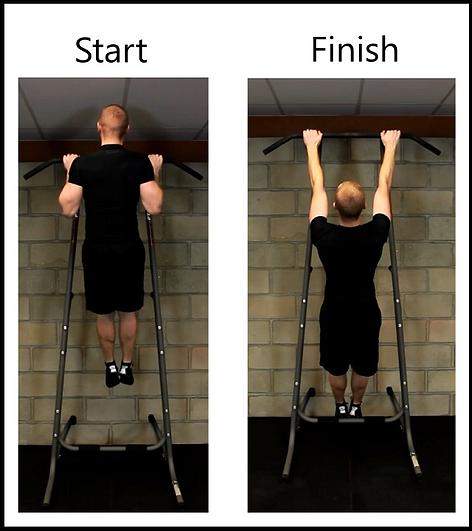
#2: Assisted Pull-up Machine
If you have access to a fitness gym (or if your climbing gym happens to have one of these), you may use the machine the same way you would a pulley.
Overly-wide grip resulting in an inability to attain a 90-degree elbow angle (Photo: Gym Bulk)
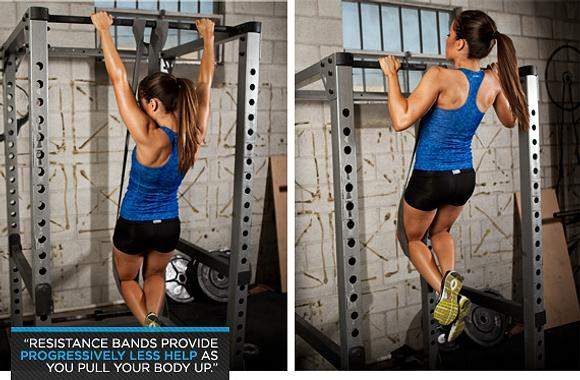
#3: Resistance Bands
Unless you have a bunch of incremental resistance bands, linear progression may be hard to achieve and quantify using this method. However, with four or five bands, the process is entirely possible, as bands can be combined for earlier workouts to take off more weight. The one advantage of bands is that they provide the most assistance at the hardest, bottom part of the movement, and almost no assistance at the top.
Perfect-width grip with the hands pronated (Photo: Body Building)
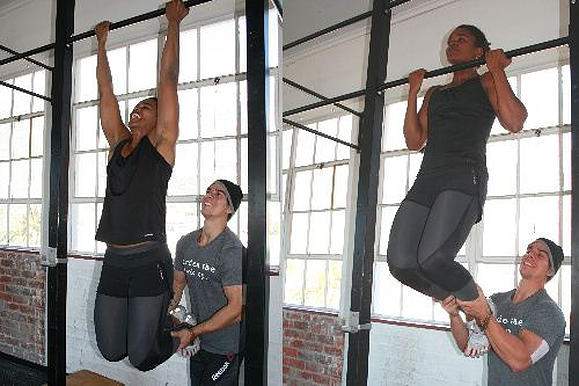
#4: Patient, Reliable Partner
If you are friends with someone who is willing to help you with every workout and is experienced enough to give a bit less assistance each time, then this workout is for you! The same idea, except of course there will be no way of quantifying progress. You’ll just have to trust that your partner is doing a good job (or find a new partner).
Incorrect supinated hand position, resulting in an inability to optimally engage the lats. (Photo: Cynergy CrossFit)
Assistance Exercises
There is absolutely no need for accessory exercises such as bicep curls. The goal is specificity, and we are trying to get better at pull-ups, not bicep curls. We will save the bicep curls for when we are looking to develop big, aesthetically-pleasing arms.
However, there are two exercises that you may choose to do after the 5×5 workout.
1) Negatives
Check out my Advanced Training for Climbing video for a brief tutorial. The goal here is to work the eccentric (downward or negative) part of the movement, skipping the harder concentric (upward) portion. To perform a negative jump into the top position with your chin over the bar, hold for two seconds, then lower as slow and controlled as possible. Repeat for 2-3 sets of 8-12 reps, with 2-minute rests in between.
Note the movement starts with the top rather than the bottom position (Photo: The Pull-Up Solution)
2) Inverted Rows
Check out the ExRx page for a brief tutorial. The same cues apply as regular pull-ups: just outside shoulder-width grip, pronated hands, chest up, squeeze shoulder blades together. Progress can be driven by adding 5-10 lbs each week (either with a weight vest or a backpack with weights). Once again, no more than 2-3 sets of 8-12 reps, with 2-minute rests in between sets.
Perfect-width grip with the hands pronated (Photo: Men’s Fitness)
And that, in a nutshell, is my DIY Pull-Up Manual. If you have any questions, are interested in a custom training program, or want to share your pull-up progression story, shoot me a message through my website. Until then, let’s get training!
Climb on! ~Galina


